
I’m not sure if this is the golden age of fly tying or the most confusing time in two centuries of fluff twiddling. The breadth of materials available to the modern fly tier truly is staggering and to be honest I think if I was starting out on my fly tying journey right now I would have absolutely no idea where to begin. My advice to anybody getting in to creating their own masterpieces is this – get help. Either medical or professional.
The huge range of materials is however offering the tier more and more scope to create exactly the flies they require. These days I tend to tie flies most fervently when I’m inspired by a new product. When Toby Merigan of Funky Fly Tying introduced me to Nymph-It I had a real Eureka moment which culminated in a fly that has been codenamed the Dzigi Dzigi…

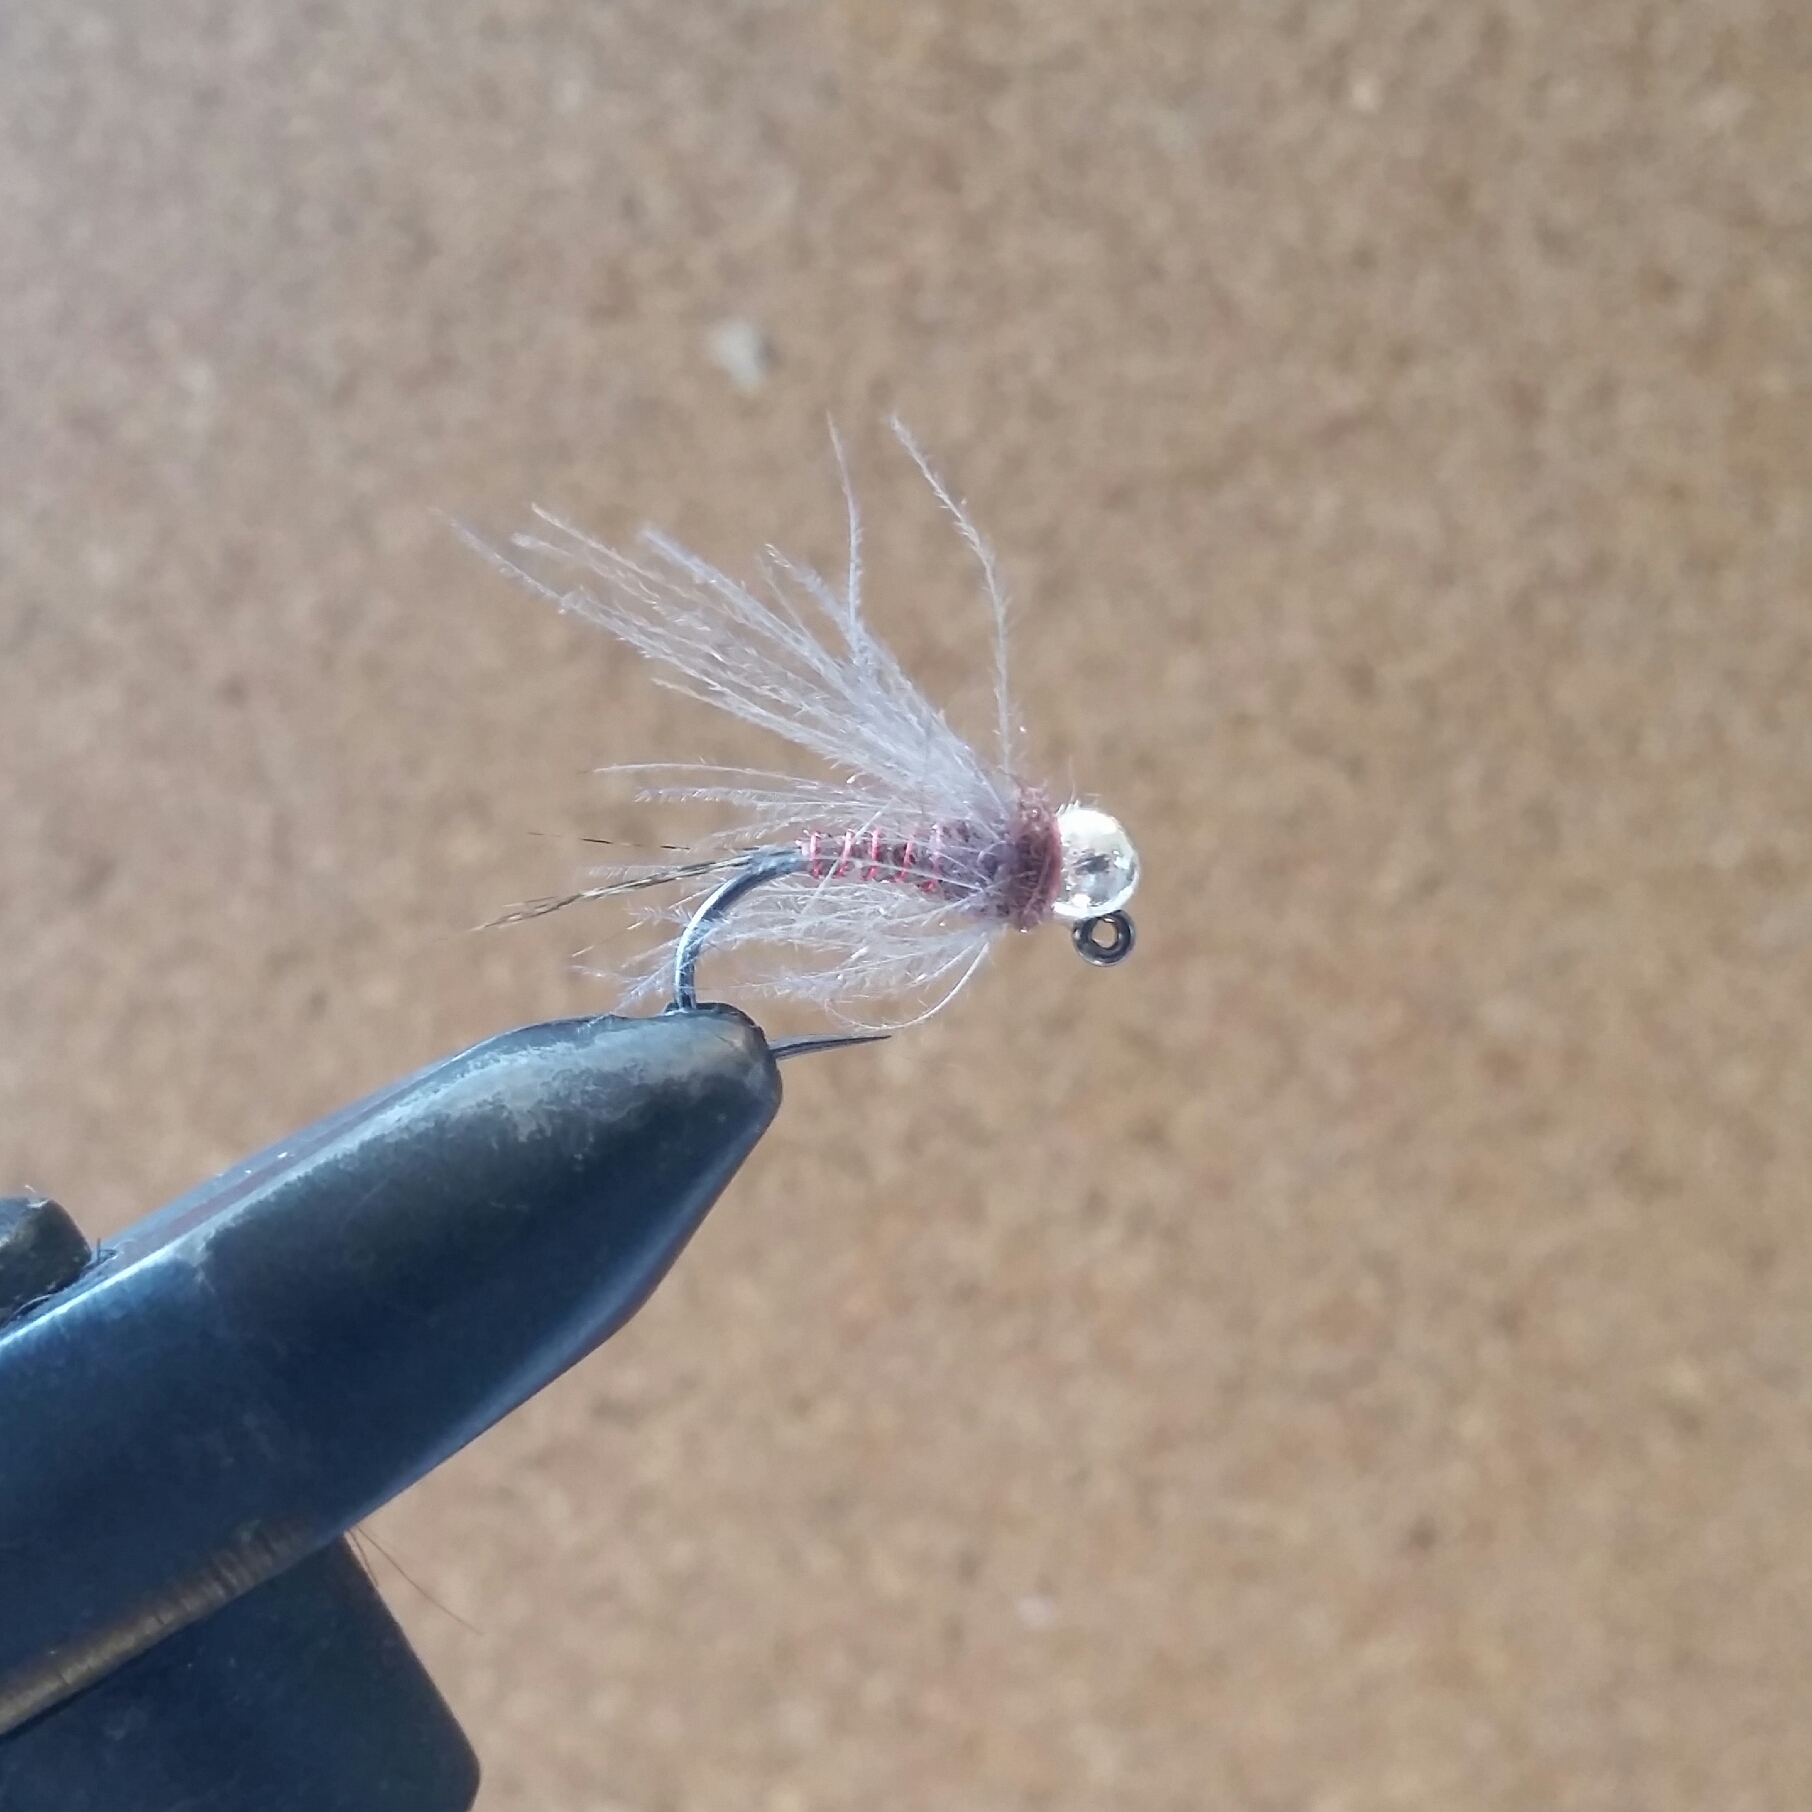
Along with the Duracell inspired purple the Dzigi is also deadly in silver and pink
Available in a range of colours, Nymph-It is a versatile and easy to use thread that lays fairly flat but can be built into bulk quickly if needed to. The UV Chestnut colour makes a great match for the purple of the Ice Dub in the Duracell but many of the other colours too make for excellent Dzigi Dzigi nymphs, particularly the UV Grey and the Copper Pink Shrimp.

There’s lots of scope when tying the Dzigi, have fun with a few different colours!
The key inspiration came from the awesome Fulling Mill Duracell Jig by Craig Macdonald. A ruthlessly efficient fly which catches both grayling and trout, the Duracell has been in my box for a while now and with its blend of weight, sparkle and cdc it’s easy to see why it’s so successful. The commercial pattern has its limitations though. Other than the bead it is unweighted and the liberal use of UV Ice Dub means that the fly often does not sink as quickly as I’d like. I’m sure that many of you already have similar flies to the Dzigi in your boxes already and as such I could never claim this as an original pattern – it owes too much to Craig’s pattern and many more for me to try that. I’d love to tell you all where the name came from but this is far too public at forum – I think you’ll find it translates very simply though…
To tie the Dzigi you’ll need the following:
A nice firm thread but nothing too heavy – my 8/0 seems to be fine.
Barbless Jig Hooks.
Slotted Tungsten Beads.
Flat lead wire.
A tail material of your choice (I use Coq de Leon but in truth a few bog standard cock hackle fibres will do.
A wire rib material to contrast your choice of Nymph-It.
Your chosen colour of Nymph-It thread.
Your chosen colour of UV Ice Dub.
CDC with nice long straggly barbs – I’ve been using some from Marc Petitjean.
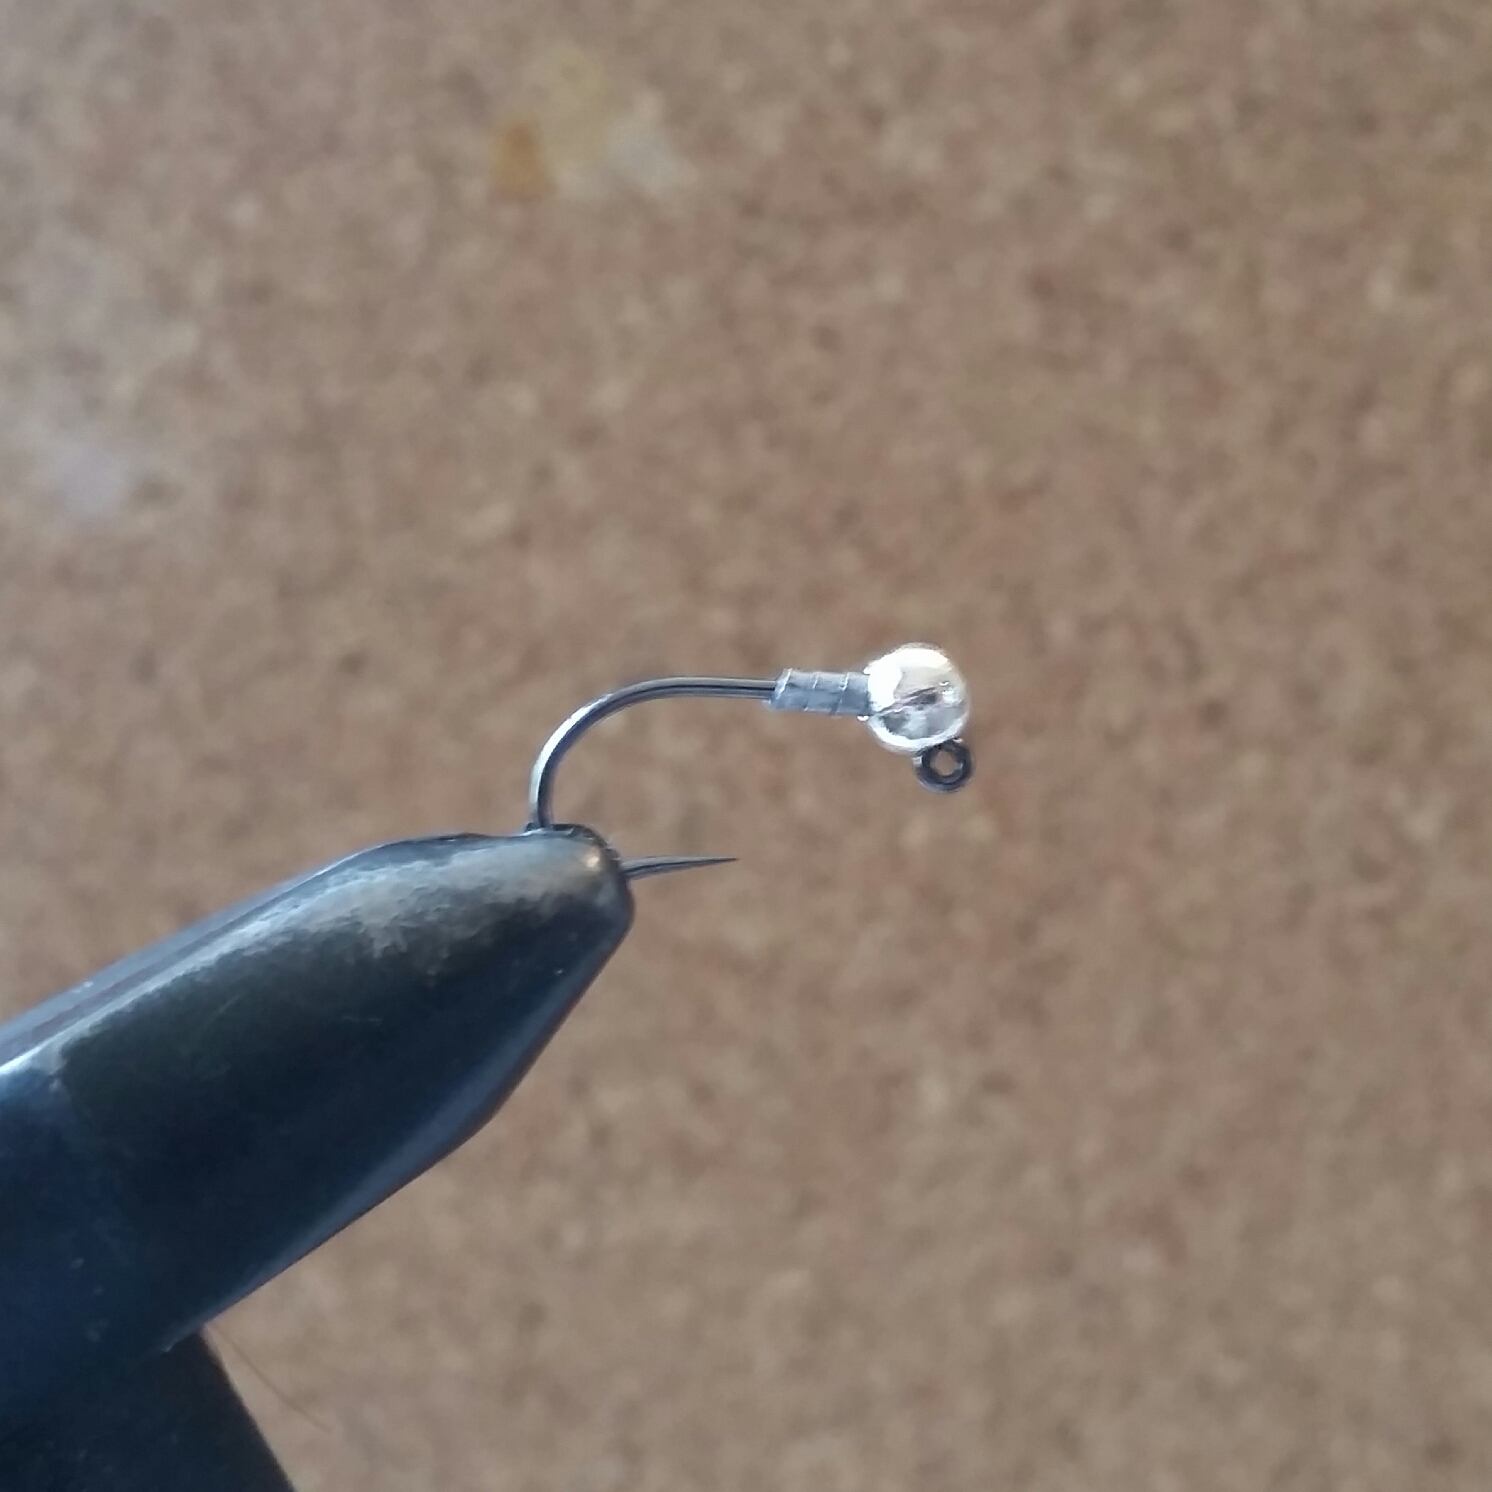
Thread your chosen slotted bead on to the jig hook and position round and over the angle. Wrap 1-4 turns of lead wire depending on the weight you require. Remember though, more lead wire equals more bulk.

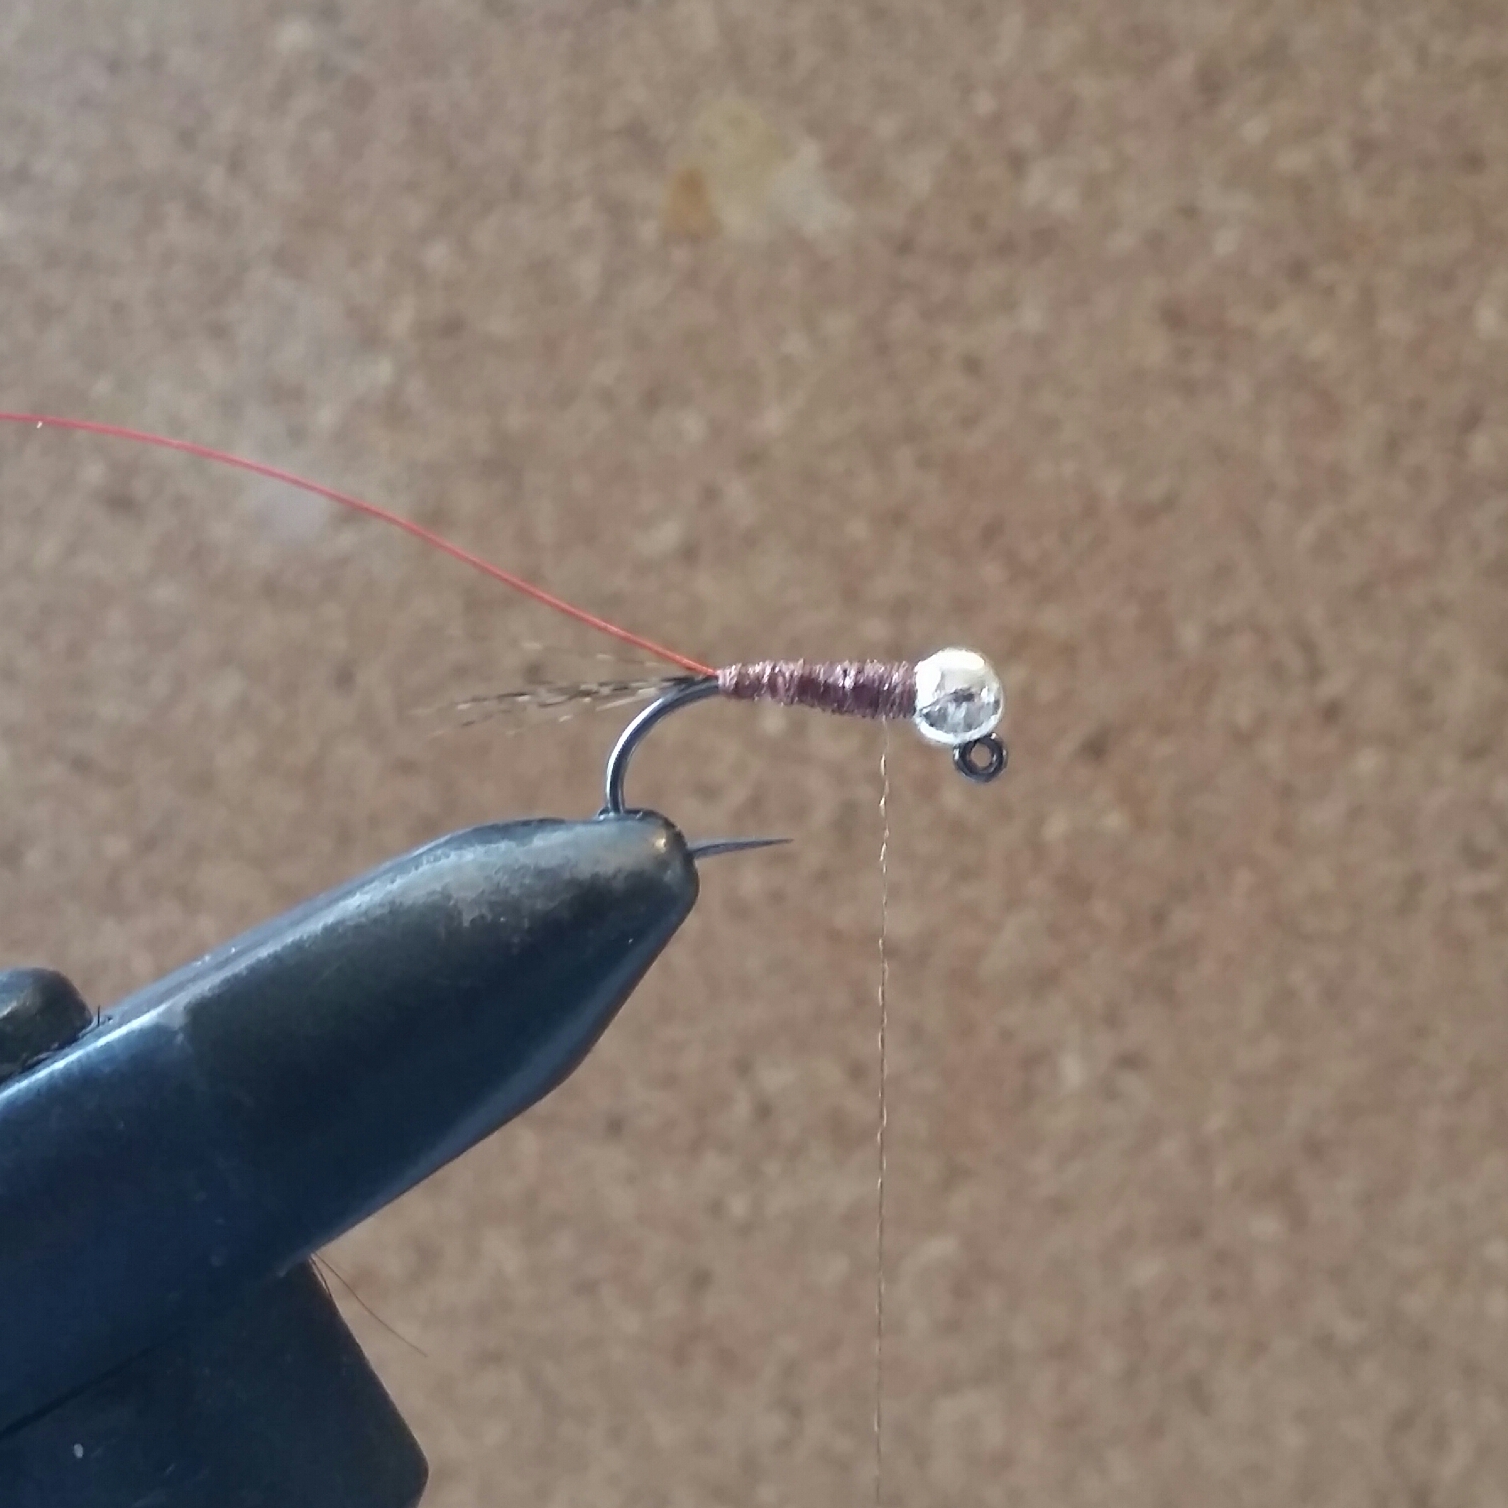
Secure the lead wire with your thread. I like to use a thread that contrasts to the Nymph-It as it will shine through when the fly gets wet. Tie in your tail material and wire rib material. Use your thread to create a nice flat body and whip finish off. You can also use some varnish or glue to make the body extra secure if you like.
Now I switch bobbins to the Nymph-It and create the body in “touching” turns towards the bend. I don’t mind a few gaps but the more anal fly tier may want to take their time here. On the way back up the shank I use the Nymph-It to create a rib for the wire to follow. Tie off with Nymph-It with a couple of whip finishes – apply some varnish again if you like.
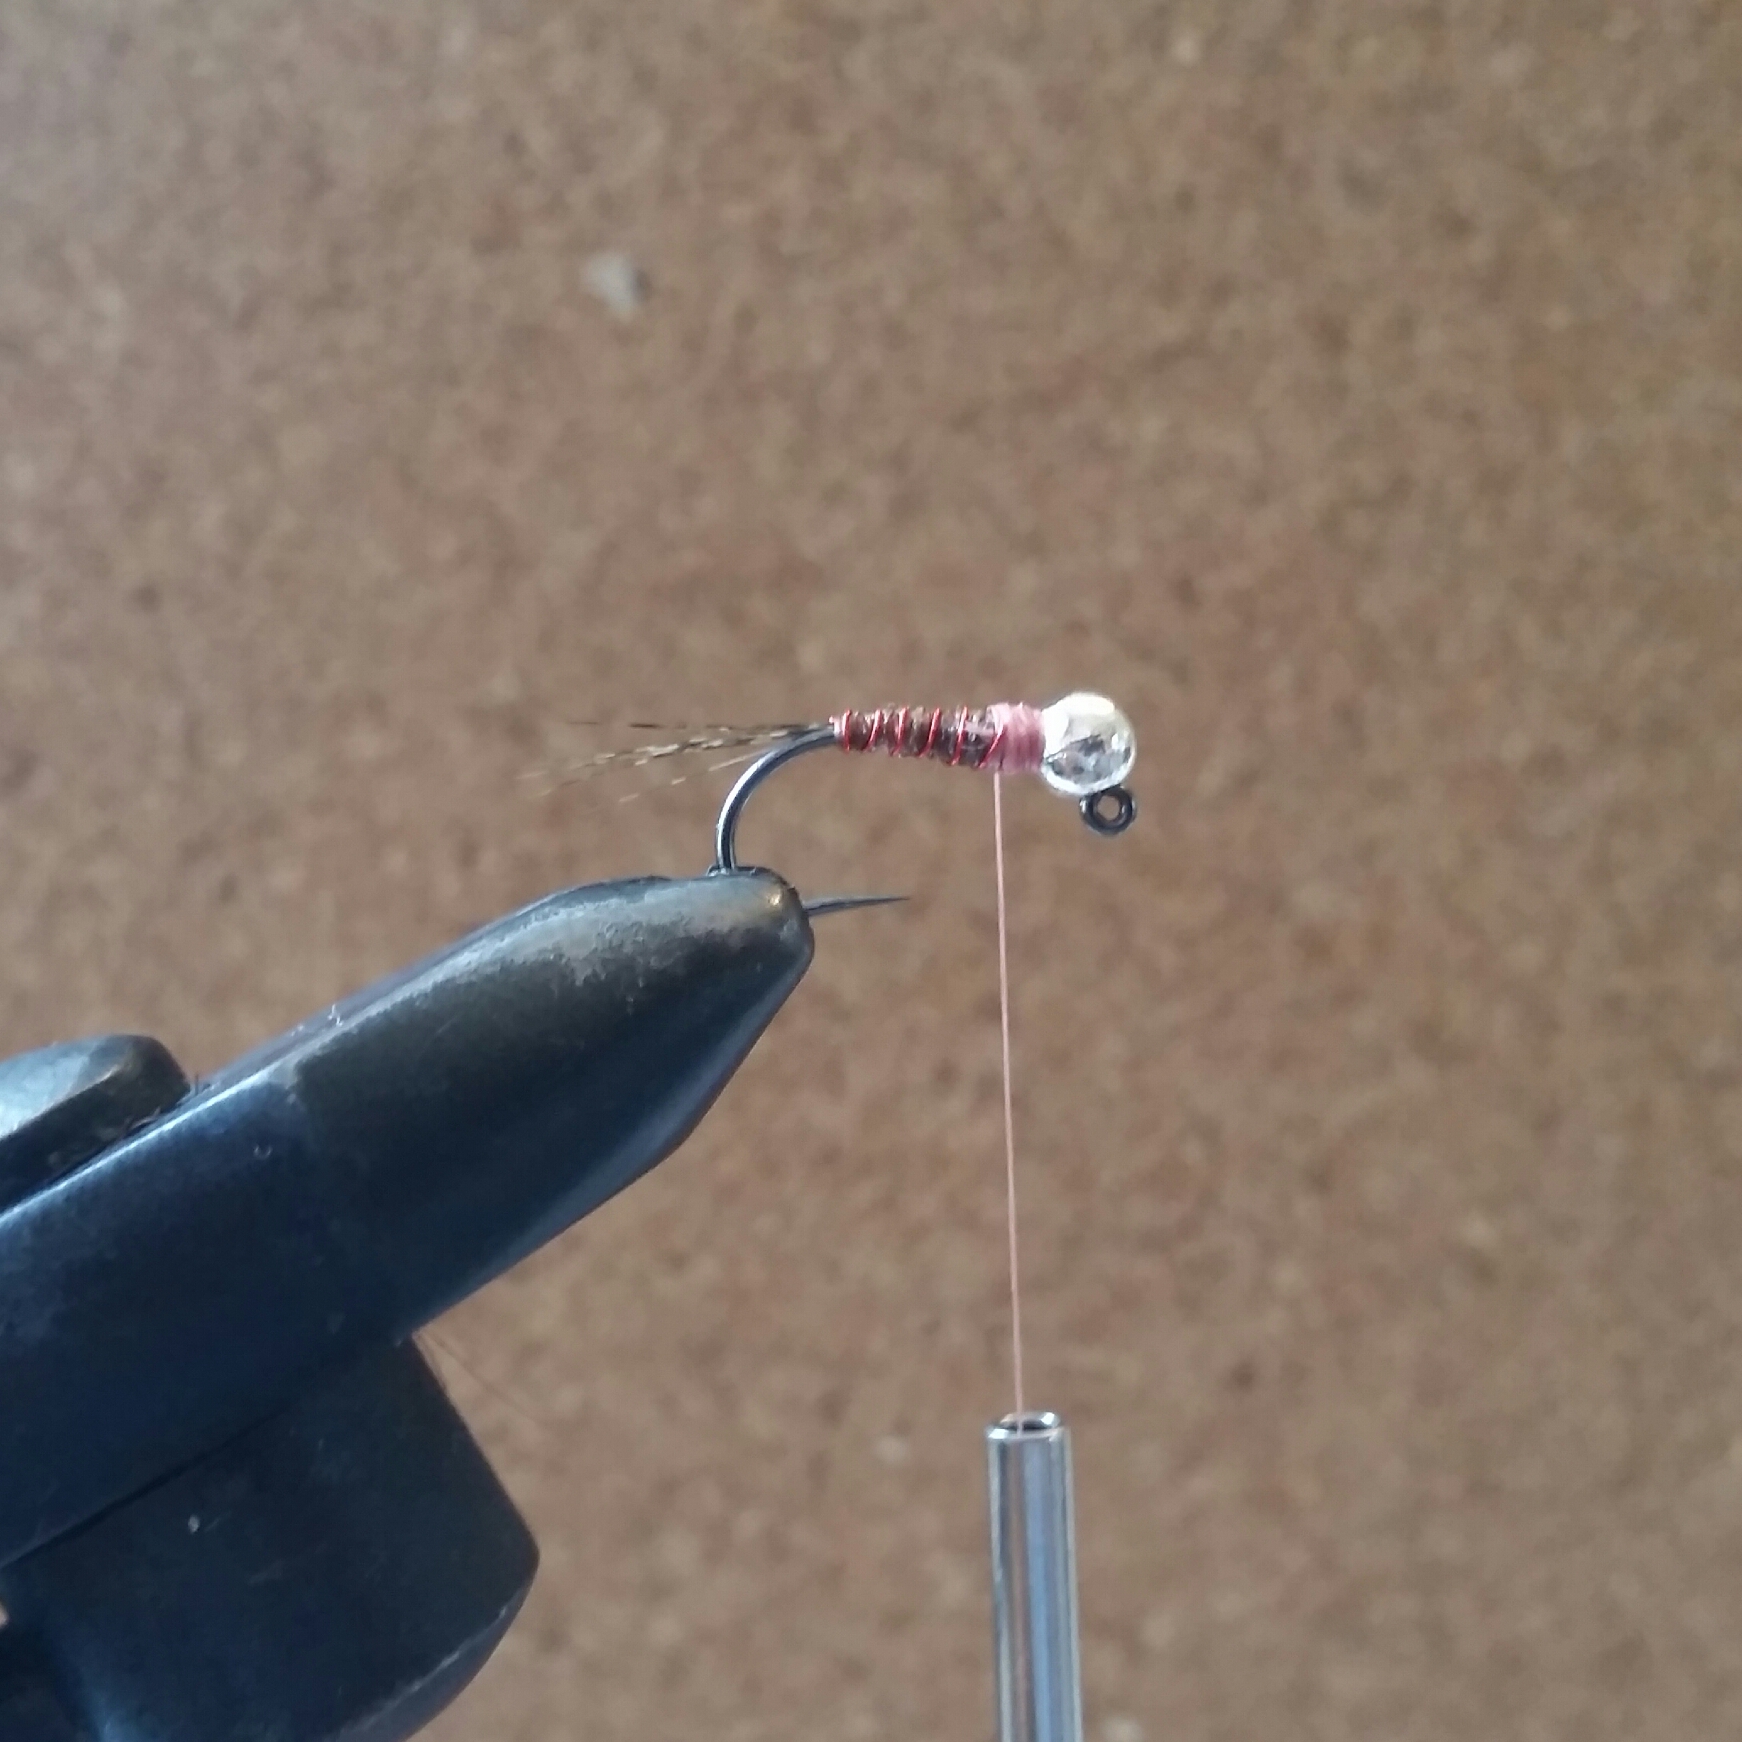
Switch back to your thread. Tie in tightly over the thorax of the fly. Tie the wire rib in turns matching those you just made with the Nymph-It and secure with your thread.

Dub your thread with the UV Ice Dub. Don’t go too crazy, ice dub becomes more straggly once it has been cast a few times. We’re looking to create enough bulk for the cdc to flare up against.
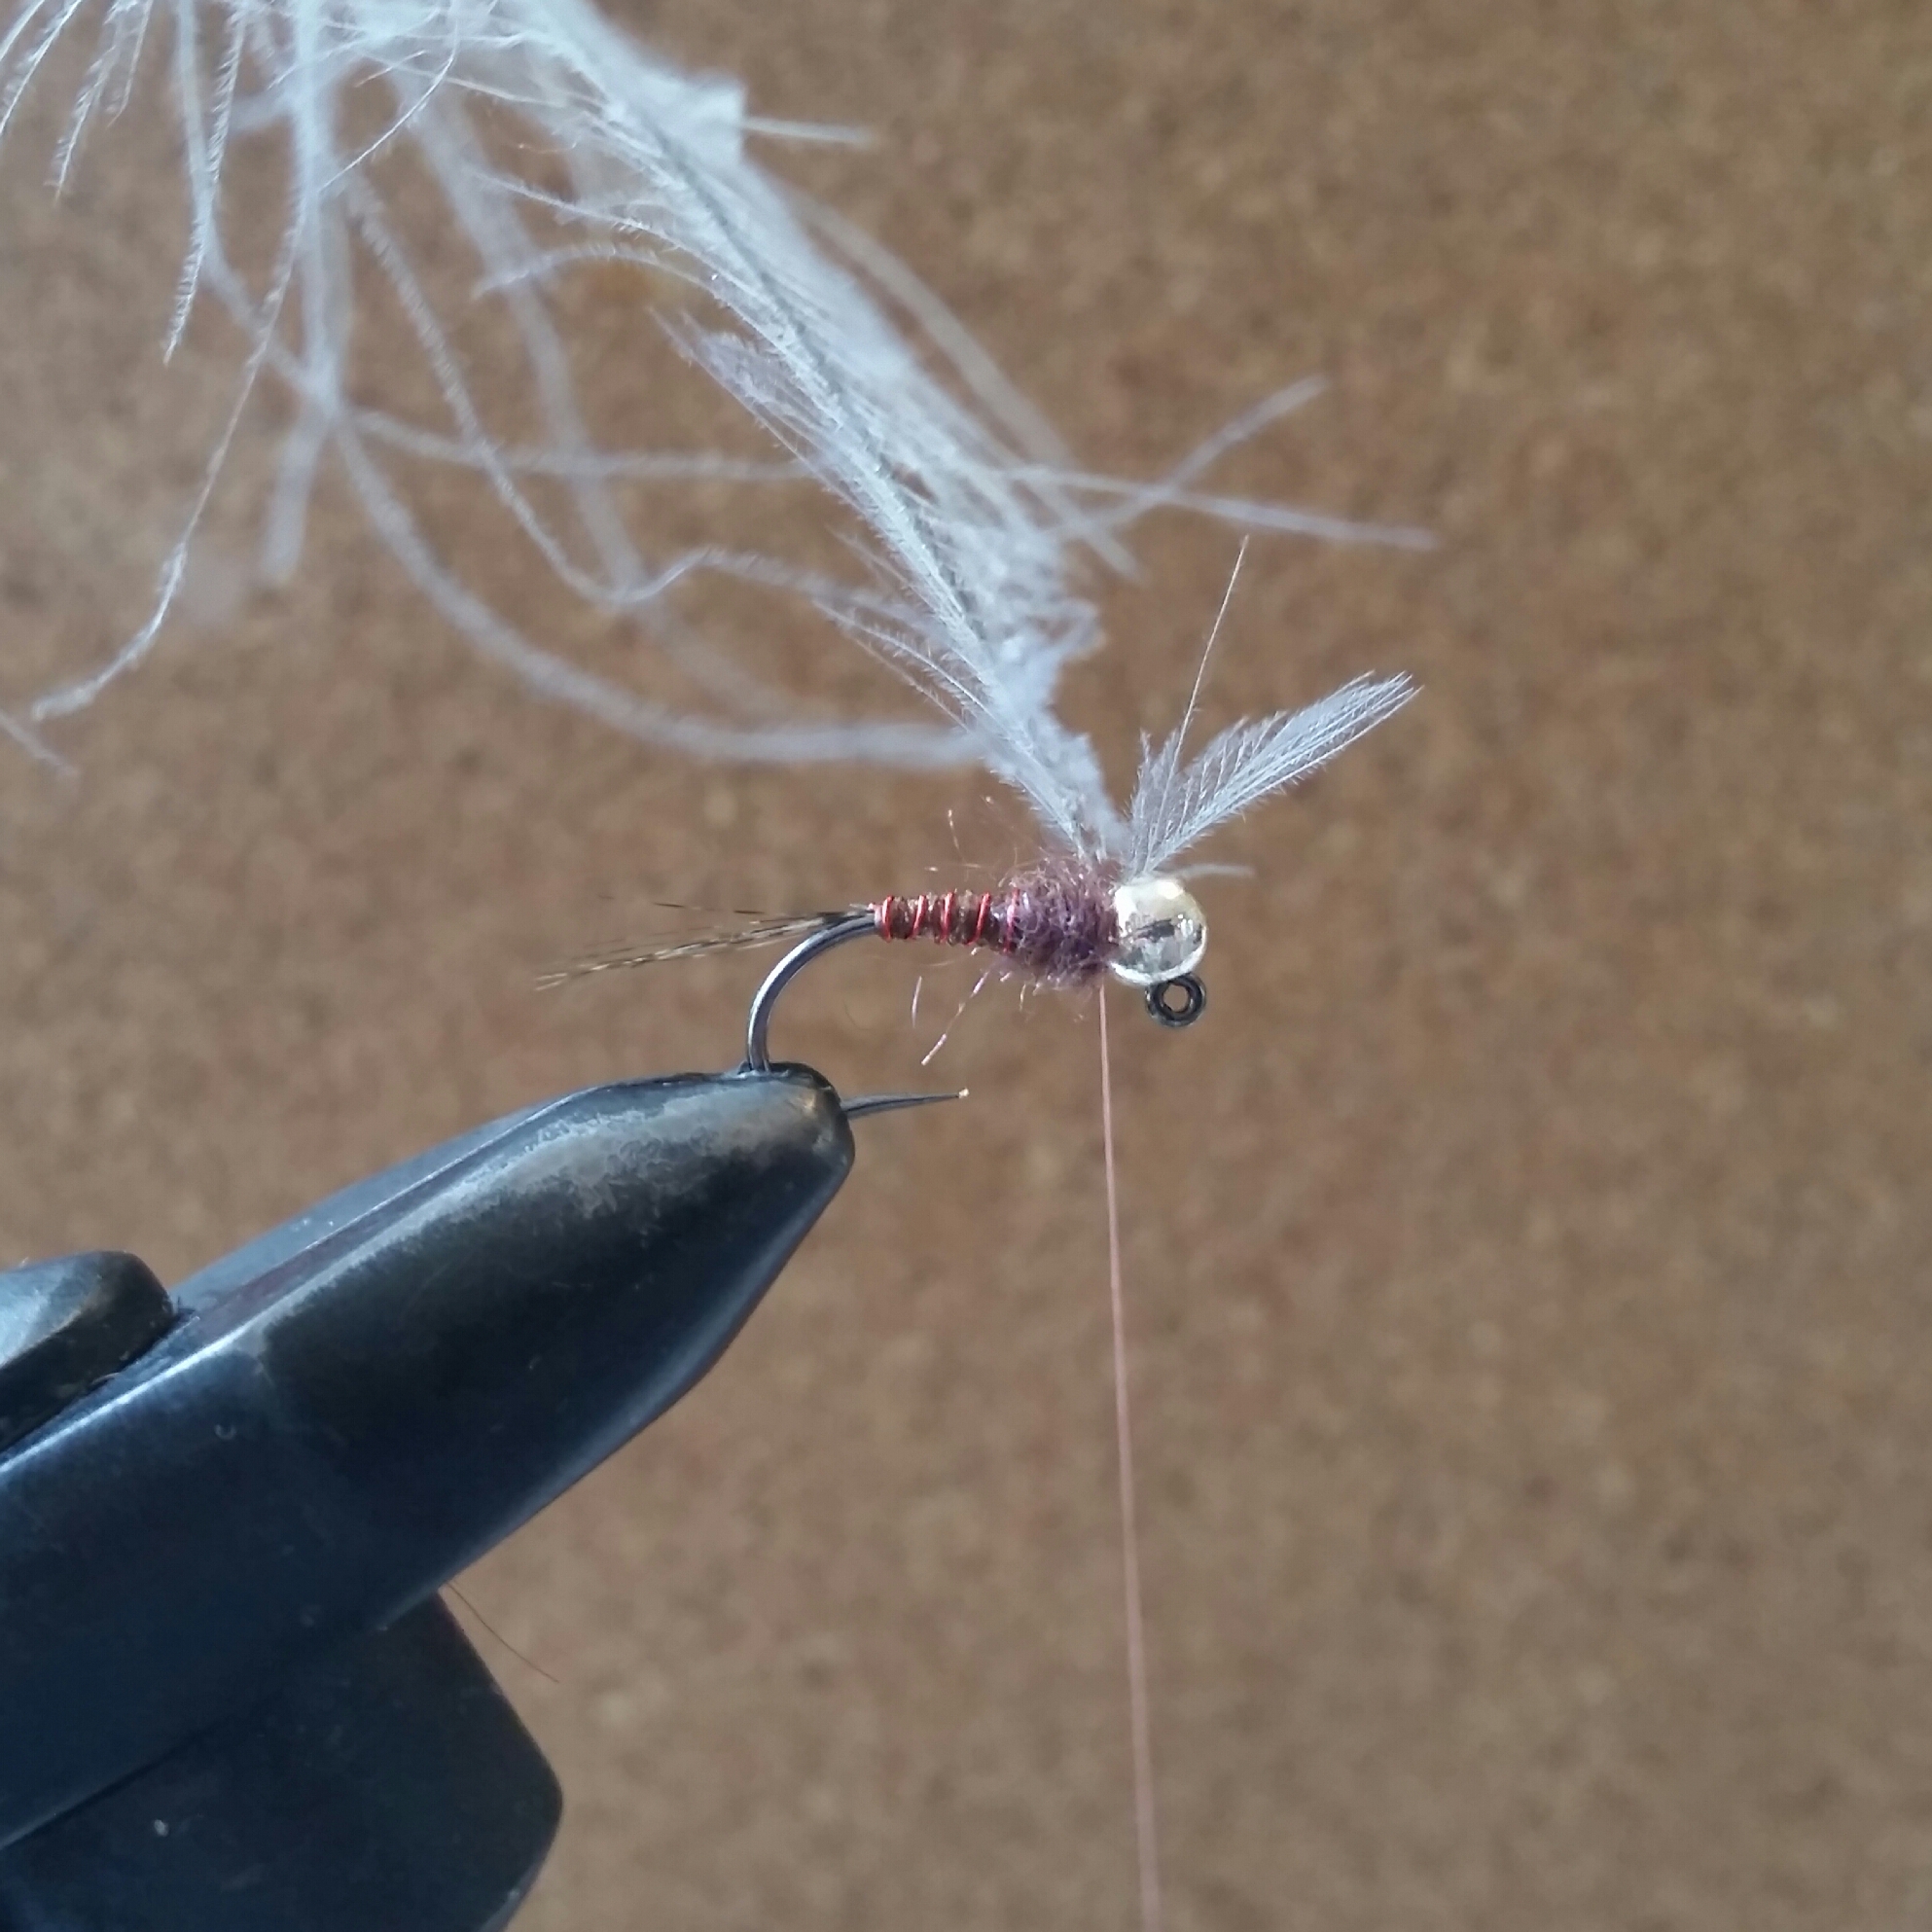
Catch in the very tip of a cdc feather. No need to use the top grade plumes, save those for little dries, something with a barb length reaching to the tip of the tail is perfect. Experiment with the colours, I’m finding more and more that a little contrast here seems to fire the grayling up.

Make just one turn and tie in. It’s too easy to get excited and treat this like a dry fly hackle but the more turns you make here the less movement you’ll get from the fibres. Remember those bugs have six legs not sixty! I throw two whip finishes in now, this means that in the future if the final part of the fly unravels I can untie to this point and finish it again rather than throw it away – how northern is that?!
Apply a healthy amount of ice dub to your thread and dub over the gap between the hackle and the bead. Whip finish tightly so that the therad cinches down below the dubbing. Varnish if you wish.
There it is, the Dzigi Dzigi in all its glory!
The Andy Buckley Angling Service Home Page

nice nymph buddy & cheers for the mention,tight lines craig👍👍👍
LikeLiked by 1 person
No worries mate, I couldn’t possibly tie this fly without mentioning your Duracell as inspiration!
LikeLike